项目作者: joeeeeey
项目描述 :
A simple charles bootstrap manual for http and https proxy
高级语言:
项目地址: git://github.com/joeeeeey/charles_use_manual.git
This project is a guide to install charles and use it(crack it).
Getting started
Set Up(MacOS)
- Download charles 4.2.5. Double click charles-proxy-xx.dmg and install it.
- Open the application and close it.
- Open Terminal.
- Switch to top level directory and run
cd /Applications/Charles.app/Contents/Java/. - run
open .. - replace the charles.jar in by charles.jar from this repo.
- Open charles again.
- Install https crt.
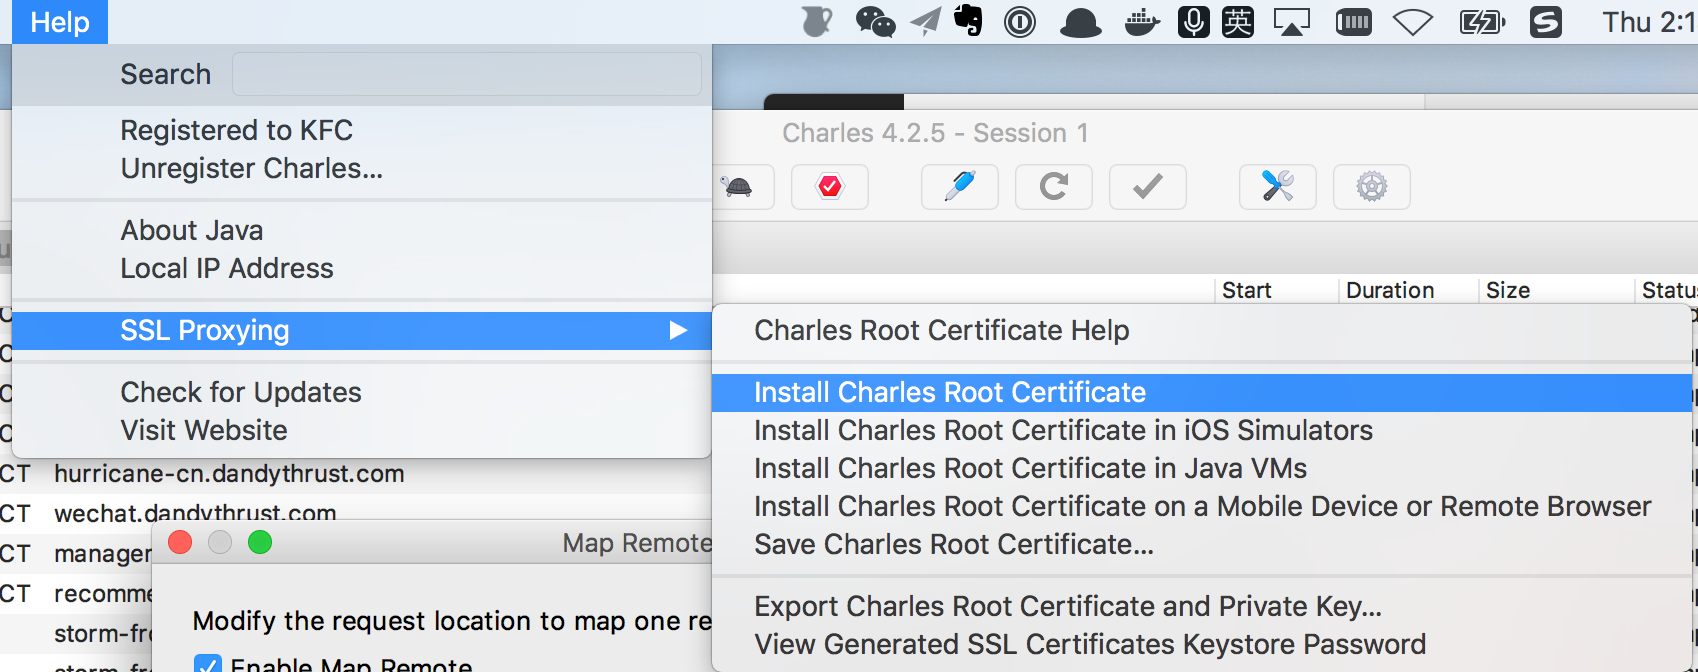
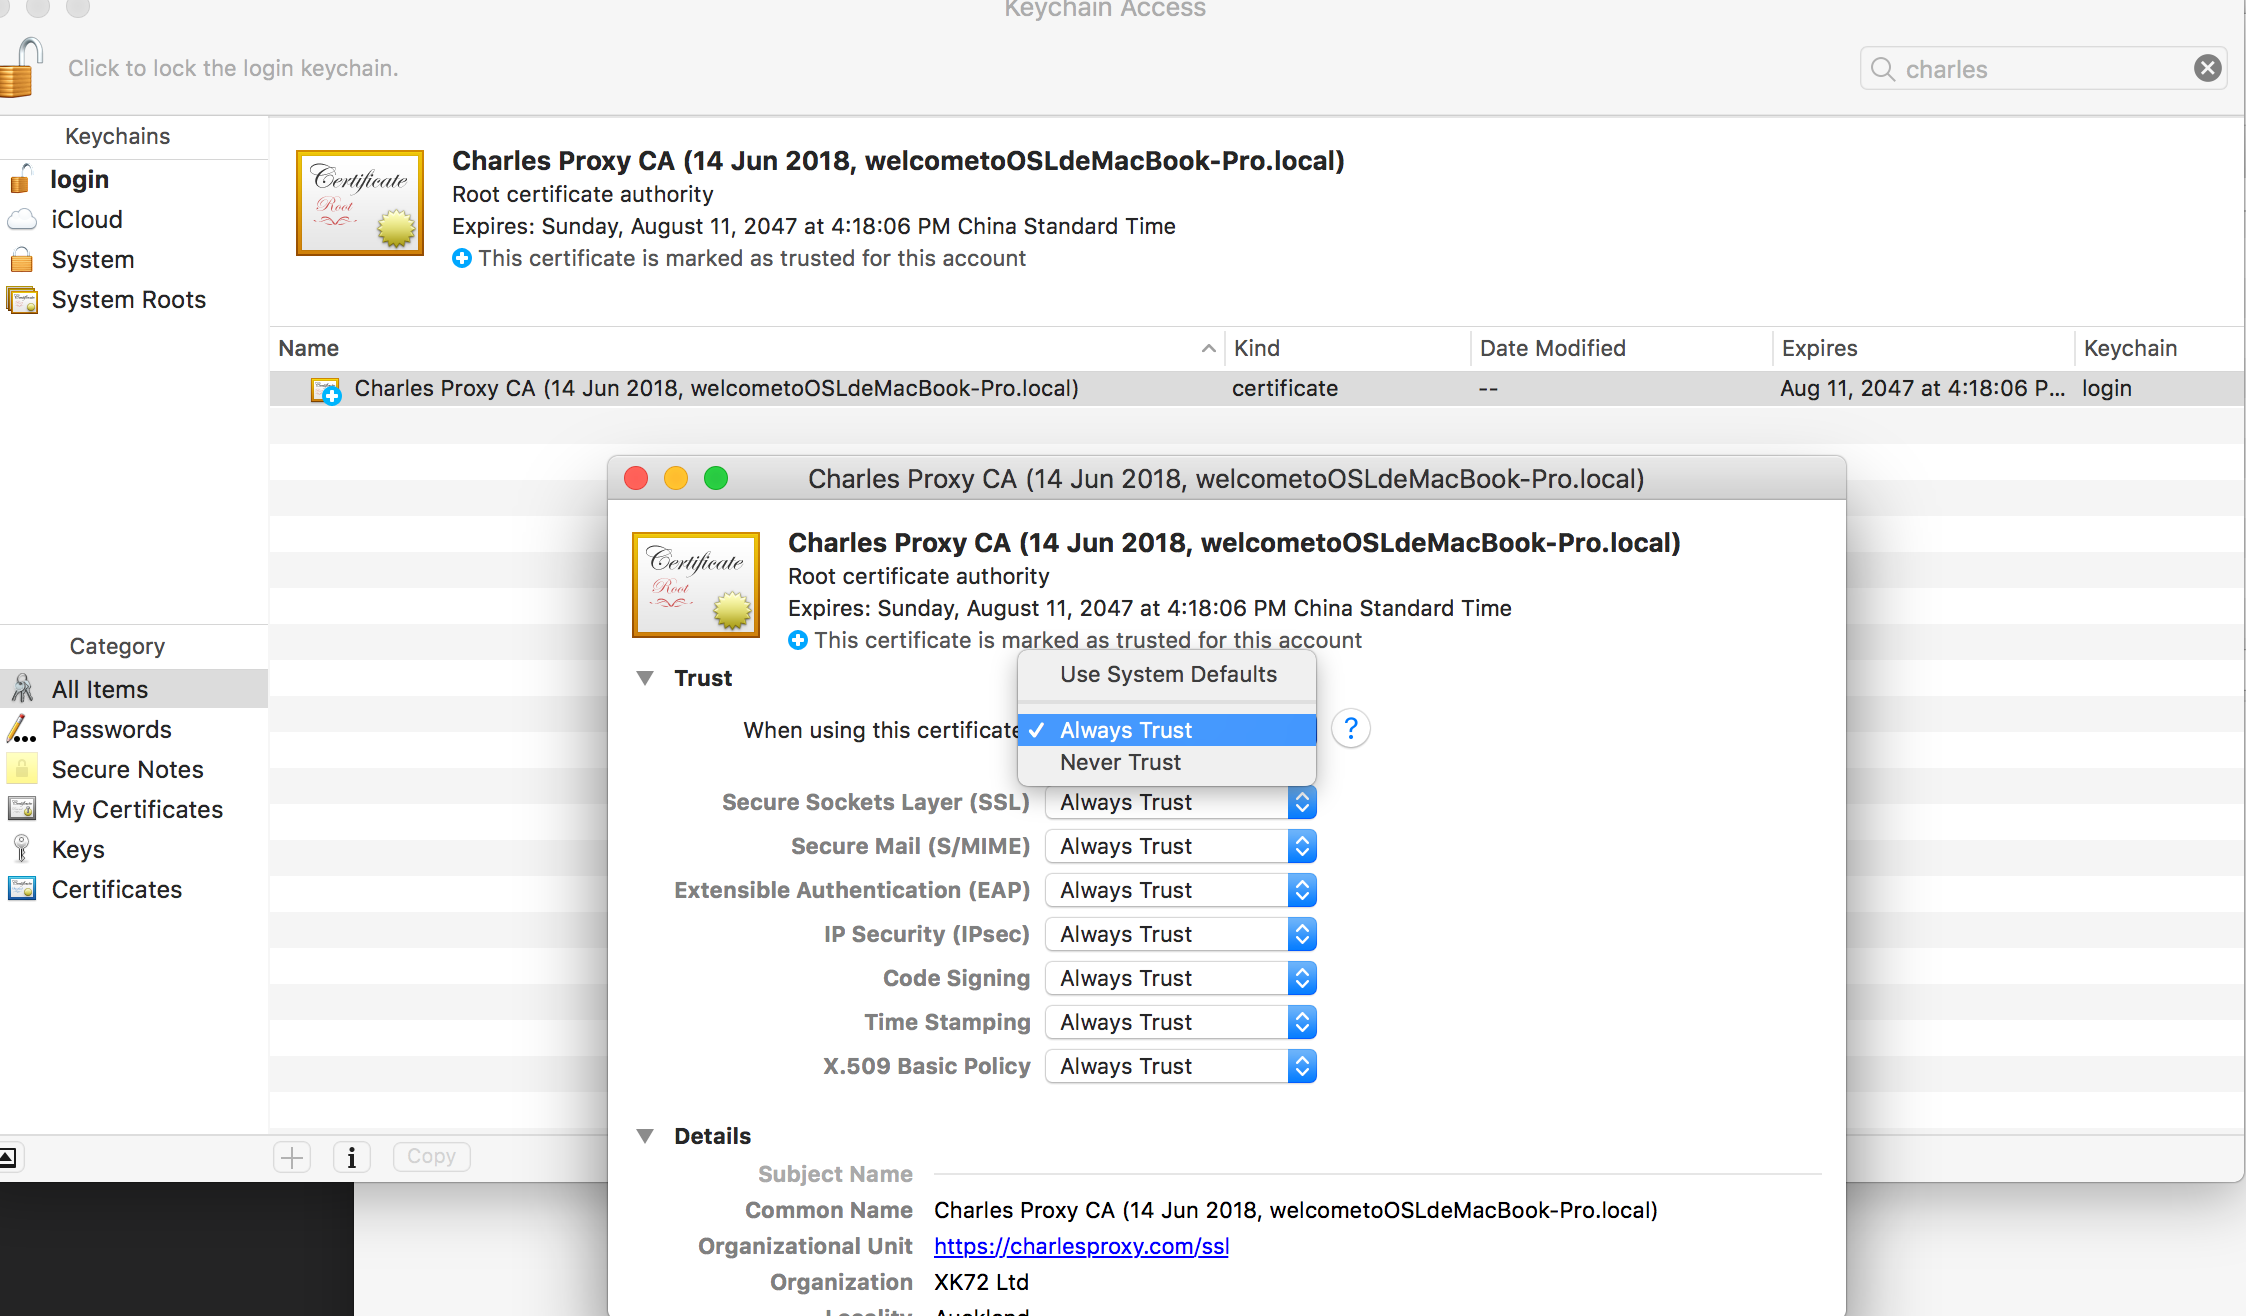
- Enable charles crt.
Enable charles ssl proxy
Click the topbar of charles: Proxy => SSL PROXYING => Enable SSL.
Add a list, eg:
HOST: xxxx.com
PORT: 443
Activate charles for macos
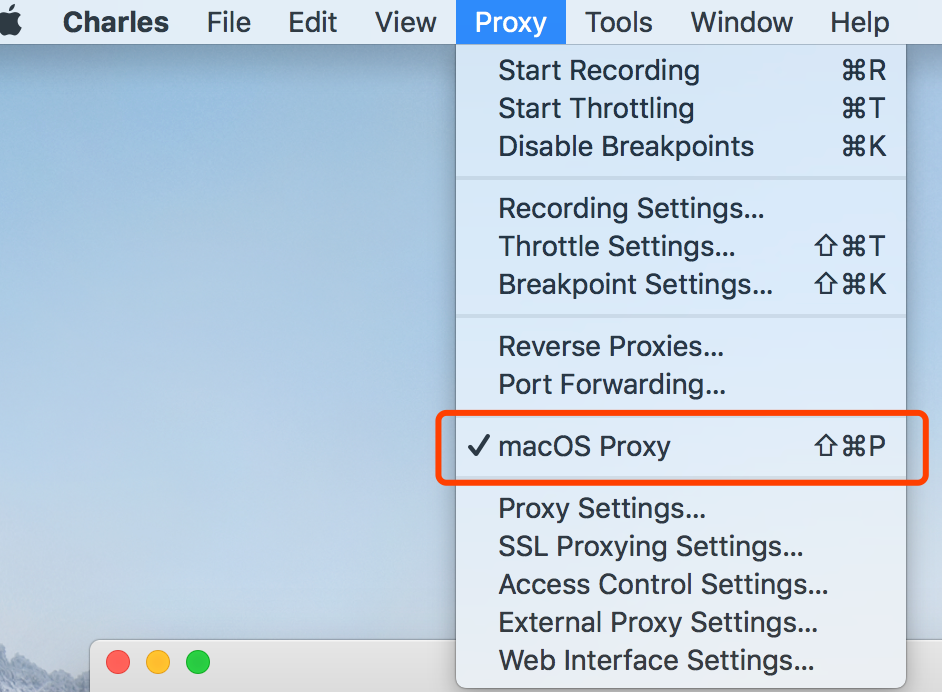
Enable Proxy(System Config)
Only use for Chrome
Install chrome plugin SwitchyOmega and config it as the following picture. Open this config.
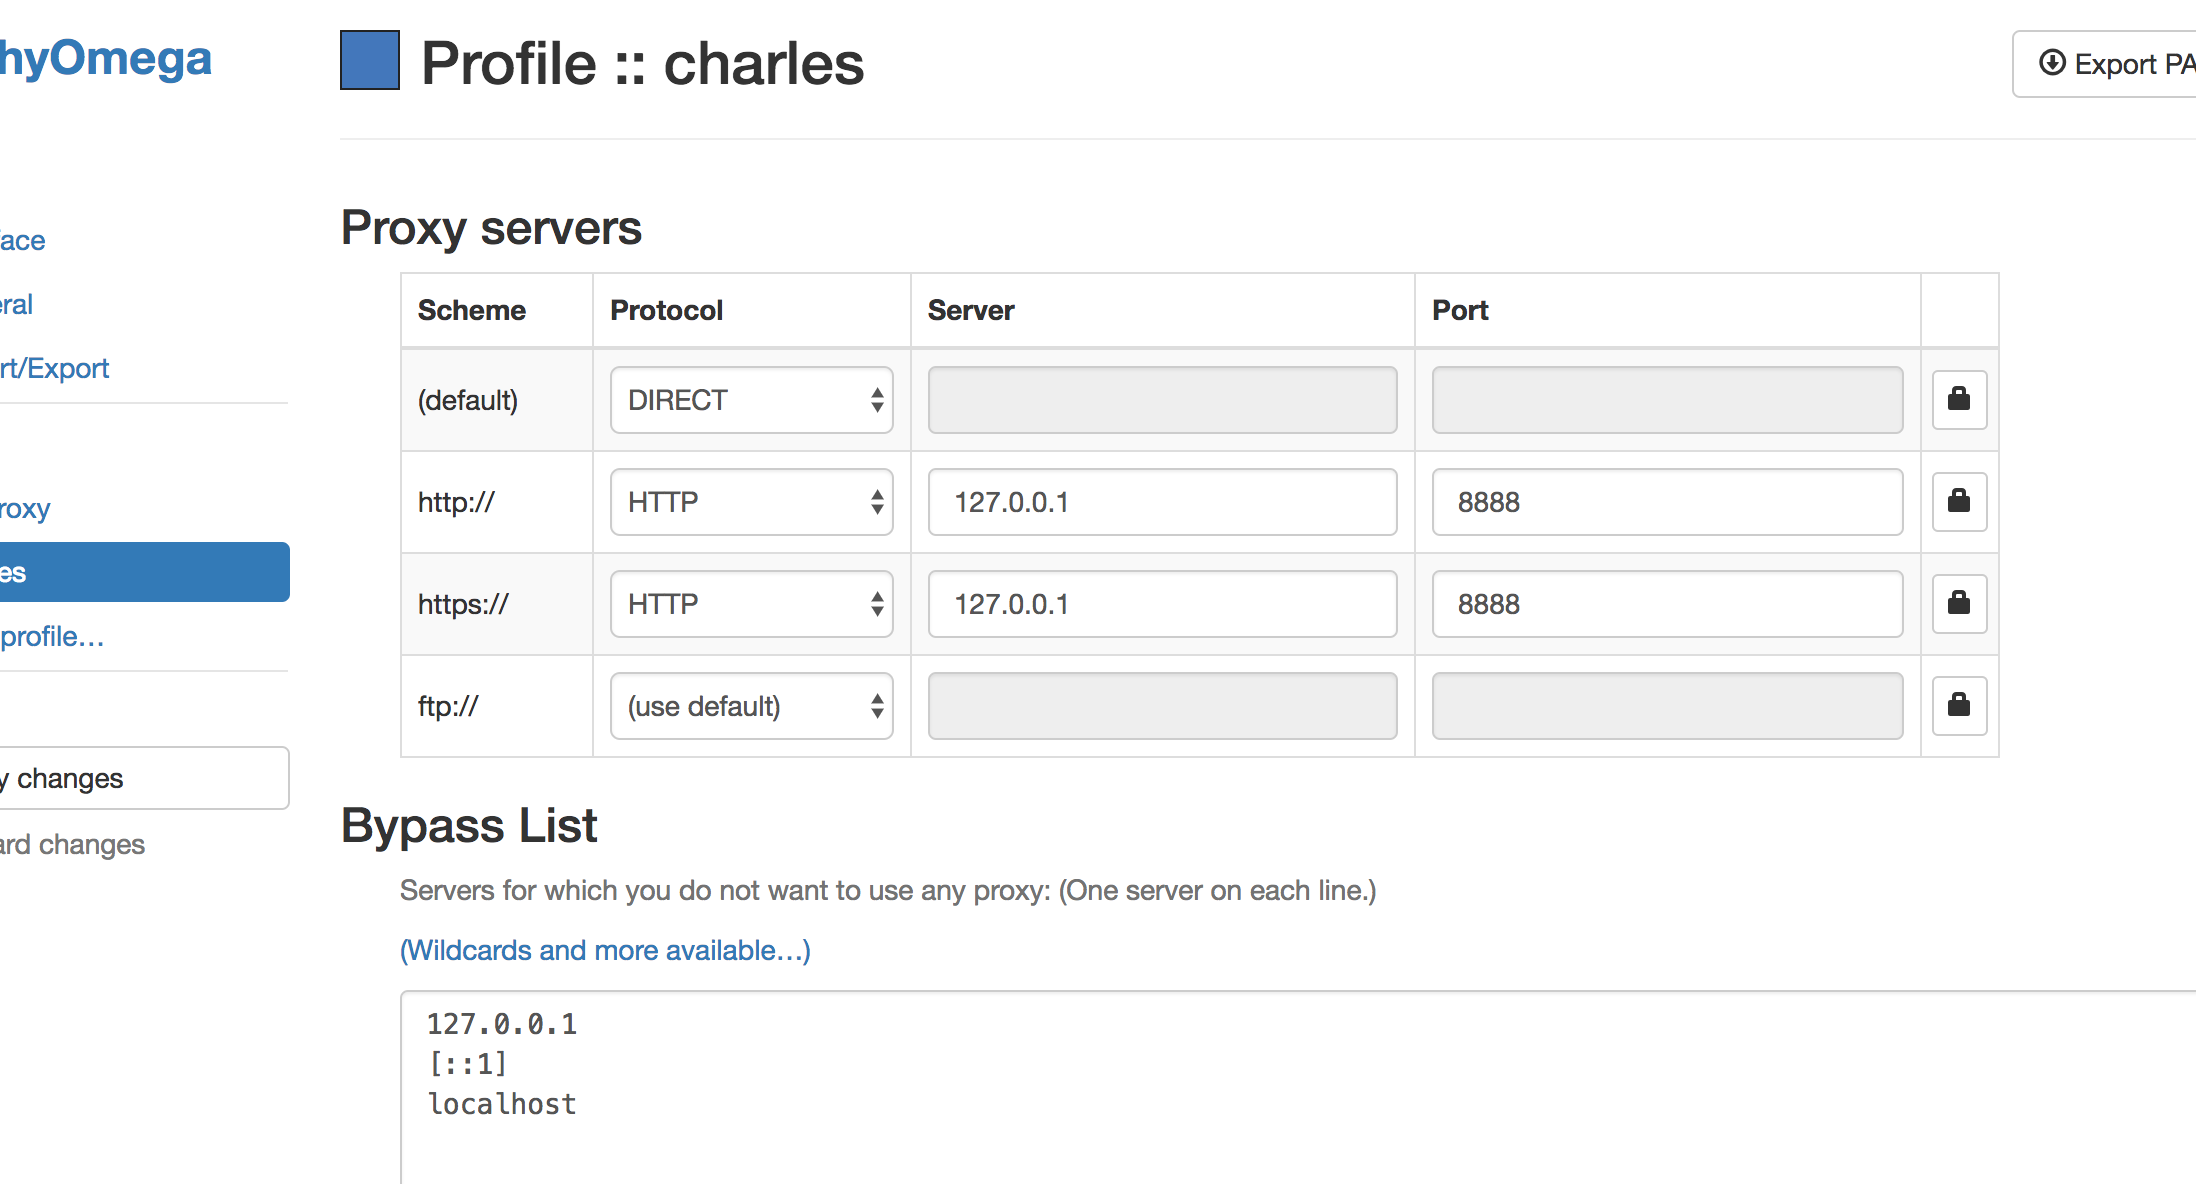
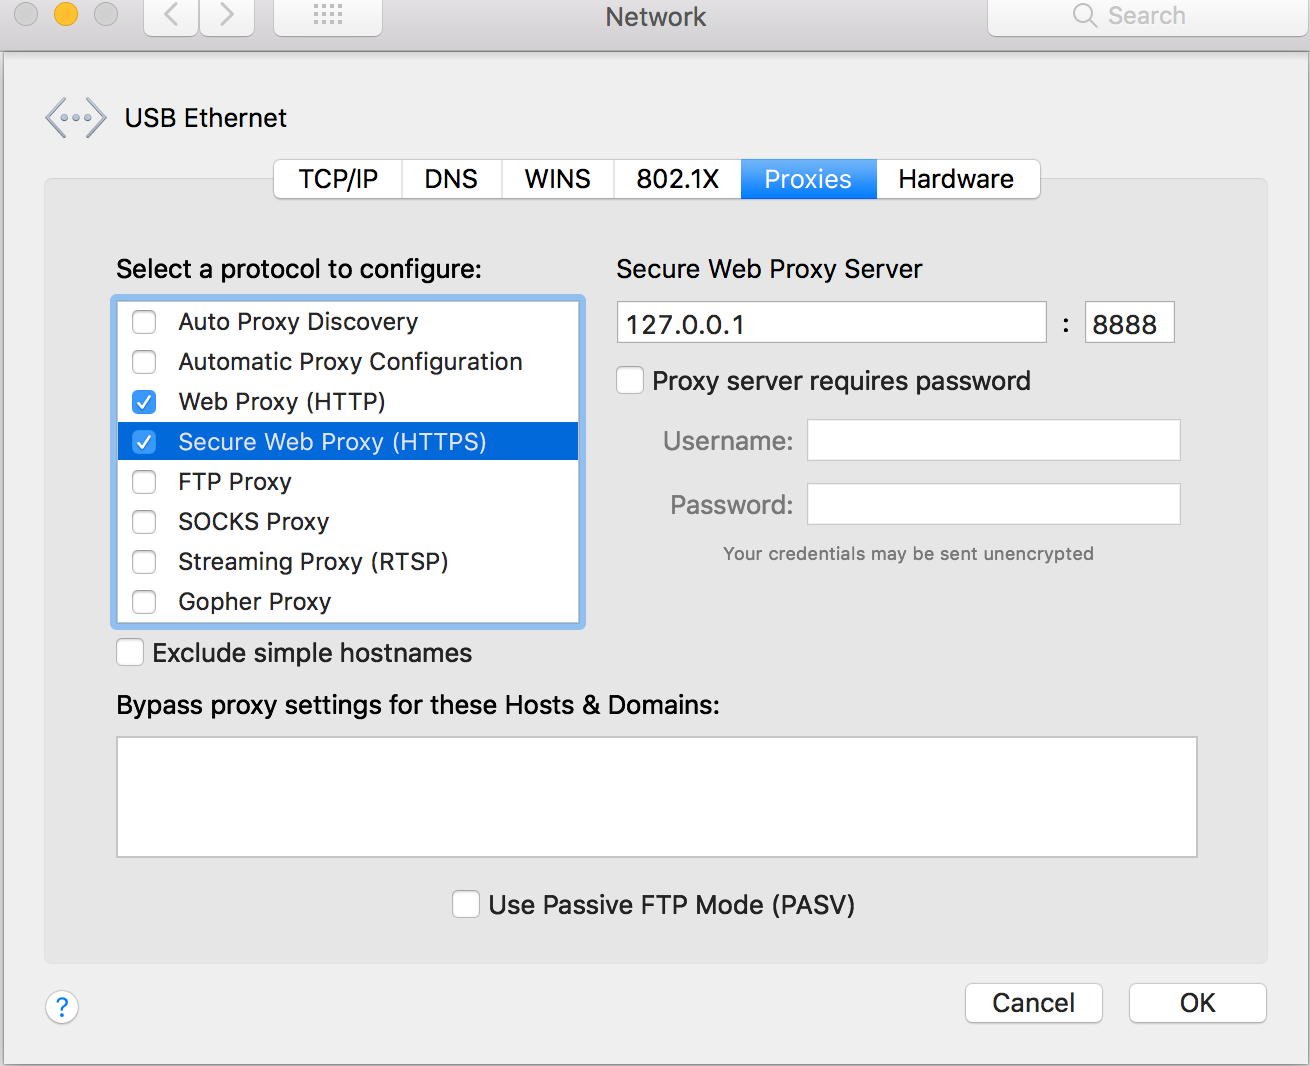
Global use(will proxy all the http and https requests from your PC)
- Go into Setting => Network => Advanced => Proxy
- Both change web proxy and secure web proxy as 127.0.0.1 : 8888
Set https proxy in iOS device
- In charles > Helper > SSL Proxying > Install certificate in mobile device.
- Set your iOS device to use Charles as its HTTP proxy in the Settings app > Wifi settings.
- Open Safari and browse to https://chls.pro/ssl. Safari will prompt you to install the SSL certificate.
- If you are on iOS 10.3 or later, open the Settings.app and navigate to General > About > Certificate Trust Settings, and find the Charles Proxy certificate, and switch it on to enable full trust for it (More information about this change in iOS 10).
- Now you should be able to access SSL websites with Charles using SSL Proxying.
Charles supports App Transport Security (ATS) as of the 3.11.4 release.